Thursday 19 November 2015
Linking Audio to Visuals and Applying effects P4 (d)


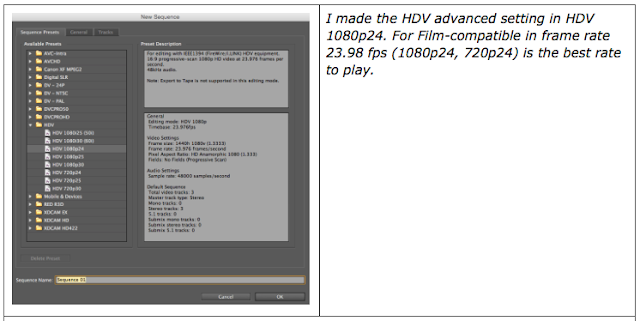
To edit my music video, I have to download the music file online. I downloaded the original soundtrack done by Coldplay from YouTube. I also asked permission by sending email to Coldplay Official to use the song for school media coursework. After that, I imported the song track into Adobe Premiere Pro CS5. It shows the music levels if I put it in Audio 1.


After I double clicked the music, it shows all the details of the song.

Applying Visual Effects P4 (c)
For visual effects, I used many effects in speed video edit, auto colour and contrast, video translation, opacity. The screenshot images below shows the steps that how I did it.


This is about the Speed of a single video clip. I right clicked the video clip that I would like to change speed, and choose Speed/Duration. I changed the speed into 70% to make the speed goes slower.

This is about the opacity. It helps me to show two clips play together. In order to do that, I needed to click the two video clip that I wanted to play together and went to effect controls, and changed the opacity into 70% or even less.

In Premiere Pro CS5, there are lots of video effects. Auto colour and Contrast are what I used in this clip. It corrects the colour and contrast by itself to the clip. In order to do that, I went to the left select, and clicked Video Effects, Adjust. After that, I dragged the effects to the clip.

This footage I put in the effect of Color Balance (HLS) and arrange the Saturation into -60º. It makes the footage goes a bit darker, and it can makes the audiences think it feels more like memories. All of my memories put in Saturation lower.

At the end, I put the opacity of both footages into 40% and 60% to make a comparative effect of his smile between the first time they saw each other and a long time didn't see each other. I did the same thing to Emma's smile.
Producing and reviewing an off line edit P4 (b)
This is a shot list practice that I practiced before I film the footages for my music video, to do this, it makes me to have a better understanding about the process of the camera and use of lens.
This is the first cut of my music video. I tried to put all my footages in the editing timeline. However, they may not in the right timing or places. furthermore, I can discuss the first cut video with my media teacher and she can give me some suggestion through the video. Also, I may also need to add more video effects and reverse time into the footage through the editing stage, to do that it makes my music video become more successful.

Next, I have use a lot in video effects for the editing of my footage, the reason to do this, is because it can make my footages run with a better feeling and colour. I did used Auto Colour and Contrast in Adjust for some of the footage.

I put the opacity of both footage down at the same time, therefore it is able to make both footage play at the same time. In this clip, the drum footage was in 30% of opacity, and the running footage was in 70% of opacity.


In this clip, I like to show that its taking about that past of their life, therefore I used Colour Balance (HLS) and changed the Saturation from 0.0 to -60.0 to make the footage look a bit darker in colour but its not black and white.

Logging rushes & creating an edit decision list P4 (a)
In this section, I am going to talk about how do I follow the shot list to film the music video as I planned earlier, the importance of shot list and set up a Adobe Premiere Pro document. Furthermore, I will show my footage folder as screenshots and discuss about how do I organise them.


Shot list
These images are the shot list that I have made when I was doing storyboard. It lists about the shots in different scenes by using different angle and distance to film. I printed out these sheets, and checked through them while I was filming the footages with my casts Thomas and Emma. I filmed the scenes one by one and ticked them after I done the shot. After that, I will import the footages to my laptop and organise them into separate files with dates on them. I checked the footages and named them afterwards. I ticked one more time to make sure I have done the shot and have it in my laptop, therefore, it helps me to have less chance to miss shots that I planned to have in my storyboard.

Aspect ratio film, the image shows there are various of television or screen aspect ratio, such as 4:3, 16:9, and 21:9. Most of the television and computer monitor and using an aspect ratio of 16:9 currently, which offers a perfect fit for high definition television shows. The aspect ratio of 4:3 are normally appears in some old television, because the old televisions are square size. In addition, 21:9 of aspect ratio is always being use in video editing. Therefore, we have to choose the right one when we are setting up the Adobe Premiere Pro document for the final music video, because we can not change the aspect ratio inside the software after we have made the document.


Following Production Processes P3 (d)
In this section, I am going to talk about how did I use the equipment and how they helped me in filming. There are examples below which indicates why would I used that camera and lens, also how the angles helped me in filming. Since I am friend with the casts and they are Emma and Thomas. I asked them for helping me to film a story based on a couple. They have no problem about it because they are couples behind the scenes. After that, I told them about the action plan and schedule. Furthermore, I also researched for some other information about the genre of the music that I am going to present in my music video.
Music genre
The music track 'Fix you' is as a form of Post-Britpop/Alternative rock music from the band Coldplay. Post-Britpop is a sub-genre of British alternative rock, made up of bands that emerged from the late 1990s and early 2000s in the aftermath of Britpop, influenced by acts like Pulp, Oasis and Blur, however it is with less overtly British concerns in their lyrics and making more use of American rock influences, including post-grunge. In the other words, it is a kind of experimental music.
Diary
Once I got this unit of making music video and needed to film by myself, I invited Thomas and Emma to become our casts for my music video filming. They are Year 13, this is their final year, they also like to have some memories to look back one day in the future. Since they were couples behind the scenes, it made them have no difficulties to act out any emotions that I wanted to have, furthermore they won't have any feeling in awkward, shy, or embarrass. We were also played with a group of friends behind the scenes, which meant that it was easy to contact them before one or two days, and followed the schedule that I've made before. Therefore, we filmed smoothly and they can helped me to film more footages if I told them not enough. During the filming, we laughed a lot and enjoyed the filming. Since Thomas loved to film with his own camera someday in his home country, he also improved about my filming skills, and taught me about the camera angles. We improved our relationships through this filming unit.


At the end, I put the opacity of both footages into 40% and 60% to make a comparative effect of his smile between the first time they saw each other and a long time didn't see each other. I did the same thing to Emma's smile.

This footage I put in the effect of Color Balance (HLS) and arrange the Saturation into -60º. It makes the footage goes a bit darker, and it can makes the audiences think it feels more like memories. All of my memories put in Saturation lower.
Following Safe working practices P3 (c)
Here is the risk assessment of our film opening:


These are the equipments that I used for my music video. The main hazard that the cameras may happen are broken by accident. We held the cameras carefully, and put them in carry bag when we needed to change location to film. It also helps us to decrease the propebility of losing items.

These senses are taken by the school which is the way cars and people go by. We tried to film these senses about 6 at night, the time people won't use the road as much as normal. If there are cars, we put way the equipments, cameras back to the bags, and stand to the safe areas to avoid the risks.

We recorded a drum cover with the song in case we need to use in the future. We asked permission to use the drum room and told the Head of Music that we're going to film here. We used the drums carefully, and leaved the room as soon as we had enough footage to use.
Subscribe to:
Posts (Atom)